Silicone Prototyping: How 80% of Product Teams Validate Designs Faster With Silicone Rapid Prototyping
To explain how silicone prototyping works, where it fits in product and equipment development, and how buyers can choose the right method before committing to production tooling.
Key Takeaways
- Silicone prototyping helps teams validate flexible parts before expensive tooling decisions.
- The right method depends on what the prototype must prove: appearance, fit, function, or production readiness.
- A silicone prototype mold is faster and cheaper than hard tooling, but it is not always the final answer.
- Material choice matters. Shore A hardness, cure chemistry, heat exposure, and contact environment all affect performance.
- Ontario Dynamics connects prototype fabrication with DFM review, testing, CNC machining, and production documentation.
A product team may have a seal that looks correct in CAD, yet fails once it is compressed inside a housing. A soft grip may feel right in a rendering, then tear during assembly. A gasket may pass a visual review but fail after heat, pressure, or chemical exposure. Silicone prototyping solves that gap. It gives teams a physical part that can be bent, compressed, installed, handled, and tested before production tooling locks the design.
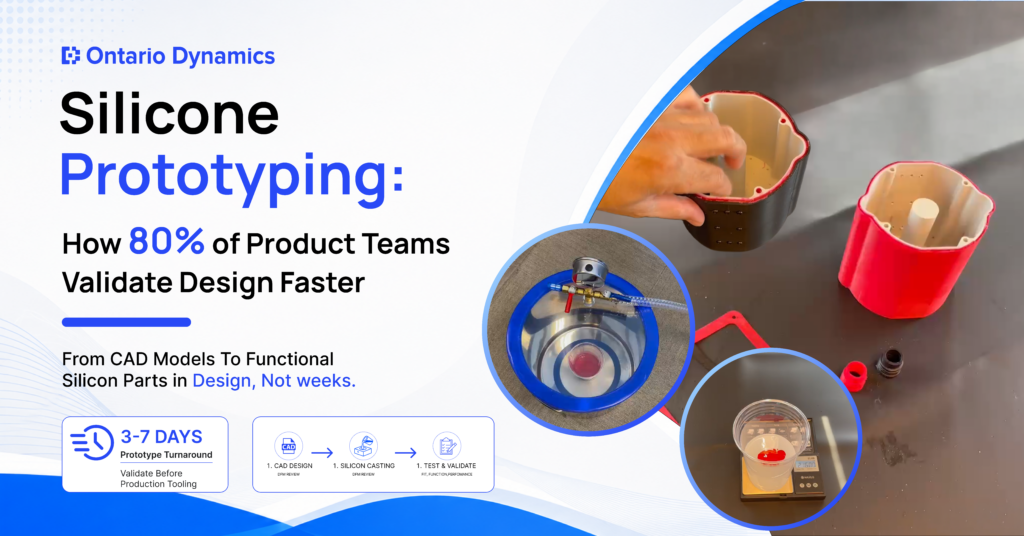
To make a silicone prototype, start with a CAD model, review the part for moldability, choose the right process, build the mold, cast or mold the silicone, cure it, then inspect and test the finished part. The method changes depending on the goal. A visual sample, a functional seal, and a pre-production silicone part should not be built the same way.
Silicone prototyping sits inside a broader product development journey How to Turn an Idea Into a Market-Ready Product covers where it fits in the full process.
What Is Silicone Prototyping?
Silicone prototyping is the process of making early silicone parts for visual checks, fit testing, functional testing, or production-equivalent validation before final tooling is built. It differs from hard tooling because the mold, process, and batch size are built for learning, not full-scale output.
Silicone is used because it can offer flexibility, heat resistance, chemical stability, water resistance, and selectable Shore A hardness across soft to firm ranges. Certain grades may also support biocompatibility needs when the correct material and documentation are selected.
TPE vs silicone for prototyping usually comes down to heat, feel, durability, and production method. TPE can work well for flexible grips and cost-sensitive parts, while silicone is often preferred for heat exposure, seals, gaskets, medical-adjacent parts, and repeated compression.
How To Make A Silicone Prototype: The Process Stage By Stage
Silicone product prototyping is not just “design, pour, cure.” In industrial product and equipment development, the process must answer a specific question before more money is spent.

Step 1: Design The Part
The CAD model needs more than the right shape. Draft angles, wall thickness, ribs, sealing lips, undercuts, and parting line options affect whether the part can be molded cleanly. DFM input before mold build prevents rework that usually appears as flash, trapped air, tearing, or poor repeatability.
Step 2: Choose The Prototyping Method
The method should match quantity and geometry. Vacuum casting is often practical for short runs under 20 units. A CNC-machined mold works better when tolerance, surface quality, or repeatability matters. A printed mold may suit fast concept checks, but it can limit finish, accuracy, and service life.
Step 3: Select The Right Silicone Material
Material selection starts with Shore A hardness, elongation, tear strength, heat exposure, chemical contact, and compression set. Platinum-cure silicone is often chosen for medical-adjacent, food-contact, or cleaner applications. Condensation-cure silicone can suit general industrial prototypes. For wider material planning, see this materials guide.
Step 4: Build The Mold
The mold controls the final part more than many buyers expect. The master pattern must be accurate. The parting line must avoid cosmetic and sealing problems. Vent placement matters because trapped air can create voids, weak edges, or incomplete details. A simple-looking silicone prototype mold can still fail if these choices are rushed.
Step 5: Mix, Pour, And Cure
Mixing ratios must be followed exactly. Poor mixing creates soft spots, cure inhibition, or inconsistent hardness. Degassing helps remove trapped air before pouring. Cure time depends on material system, temperature, humidity, and part thickness. A practical tip: always record batch, ratio, cure time, and room condition during rapid prototype silicone parts testing.
Step 6: Demold And Inspect
Demolding should not stretch the part more than needed. Thin lips, small holes, and undercuts can tear if removal is forced. After demolding, flash is trimmed, surface defects are checked, and dimensions are compared against the drawing. This step confirms whether the mold or the CAD model needs correction.
Step 7: Post-Processing And Quality Inspection
Post-processing may include surface finishing, post-curing, cleaning, insert fitting, or assembly checks. Functional testing can include compression, pull, sealing, chemical exposure, heat cycling, or repeated handling. The results should be documented so the team knows whether to iterate, change material, or advance to the next stage.
Why Make A Silicone Prototype?
Silicone prototyping is useful when the design risk sits in the material behavior, not only in the shape. Flexible parts fail differently than metal or rigid plastic parts. They stretch, compress, fold, seal, rebound, and wear.
Speed — From Weeks To Days
Silicone rapid prototyping can move faster than hard tooling because the mold is built for short-run validation. Vacuum casting can often deliver parts in 3–7 days once CAD and the master pattern are ready, while production tooling can take several weeks. Speed matters when a test build is waiting on one soft part.
Cost — A Fraction Of Traditional Tooling
A prototype silicone mold may cost far less than production tooling because it uses simpler materials, fewer cavities, and shorter-life tooling. In many prototype programs, silicone tooling can land around 10–20% of a comparable hard-tooling commitment. Treat that as a budget frame, not a fixed quote. If you are budgeting alongside this decision — How Much Does a Prototype Cost in 2026 breaks down real pricing with examples.
Design Iteration Before Hard Tooling Commitment
The biggest benefit is not only cost. It is decision control. Multiple variants can be tested in one sprint: different hardness levels, sealing lips, grip textures, wall thicknesses, or gasket profiles. That gives the team real feedback before the mold steel, supplier package, or production plan becomes harder to change.

Which Silicone Prototyping Method Is Right For Your Project?
Most product development projects need two silicone methods across different stages not one method for the entire project. A rough concept part may only need speed. A validation part may need tolerance, documented material, and repeatable geometry.
Method | Best For | Accuracy | Lead Time | Relative Cost |
Vacuum Casting | Short runs of 1–20 units and flexible parts | Medium | 5–10 days | $$ |
CNC-Machined Mold | High-tolerance parts and repeatable short runs | High | 7–14 days | $$$ |
3D-Printed Mold | Concept validation and fast iteration | Low–Medium | 2–5 days | $ |
LSR Injection | Pre-production, higher volume, and medical-adjacent programs | Production-equivalent | 10–20 days | $$$$ |
Use 3D-printed molds when the question is basic shape or early fit. Use vacuum casting when the team needs rapid prototype silicone parts for review and handling. Use a CNC-machined mold when the part must hold tighter geometry. Use LSR injection when the prototype must behave close to the production process.
A short TPE vs silicone callout helps here. Choose TPE when the part needs flexible feel at lower cost and the production route supports it. Choose silicone when heat, compression recovery, chemical stability, or biocompatibility has more weight in the decision.
How Ontario Dynamics Handles Silicone Prototype Fabrication
Silicone prototyping at Ontario Dynamics runs alongside DFM analysis, structural simulation, CNC machining, fixture planning, and production documentation. It is not treated as a standalone sample that gets handed off without context.
That matters for startups and manufacturers in Canada because a prototype should lead to the next decision. If the part passes, the team needs drawings, tolerances, test notes, and supplier-ready documentation. If it fails, the design should move back into CAD with a clear reason, not vague feedback.
Ontario Dynamics supports product and equipment development from early concept through validation and production readiness. Product Development and Product Prototyping Services explains how prototype work connects with the full development path.
Tell us what you are building and what you need to prove we will recommend the right prototyping approach for your stage.
Conclusion
Silicone prototyping is a stage-specific decision, not a single method. The right process depends on what the team needs to prove: appearance, fit, sealing, durability, material behavior, or production readiness.
A fast prototype is useful only if it answers the right question. A cheaper mold helps only if it avoids a more expensive mistake later.
Ontario Dynamics, Canada supports product and equipment development by connecting silicone prototype fabrication with practical design review, testing, CNC machining, and production documentation. To discuss your project, start with the Ontario Dynamics contact page.
FAQ
Order enough to test the real risk. For a simple fit check, one or two parts may be enough. For assembly trials, seal testing, or user handling, a batch of 5–20 parts gives better feedback because it shows variation, not only one sample.
Sometimes, yes. The closer you need to get to production behavior, the more carefully the material and process must be chosen. A cast prototype may look and feel close, but LSR injection is a better route when the part must match production behavior.
Common causes include poor wall thickness, trapped air, wrong Shore A hardness, weak tear areas, bad parting line placement, cure inhibition, and unrealistic tolerance expectations. Many of these problems can be caught before mold build through a proper DFM review.
Yes, but only for limited runs. Reuse depends on geometry, silicone type, mold material, undercuts, and demolding stress. A mold used for a simple part may last longer than one used for a thin, detailed, or aggressive undercut part.
Choose silicone when heat, sealing, repeated compression, chemical exposure, or biocompatibility matters. Choose TPE when you need flexible feel, lower part cost, or a thermoplastic production route. The right choice depends on how the part will be used, not only how it feels in hand.
Ready to Build Your Product?
Let’s turn your idea into a production-ready product engineered for success.