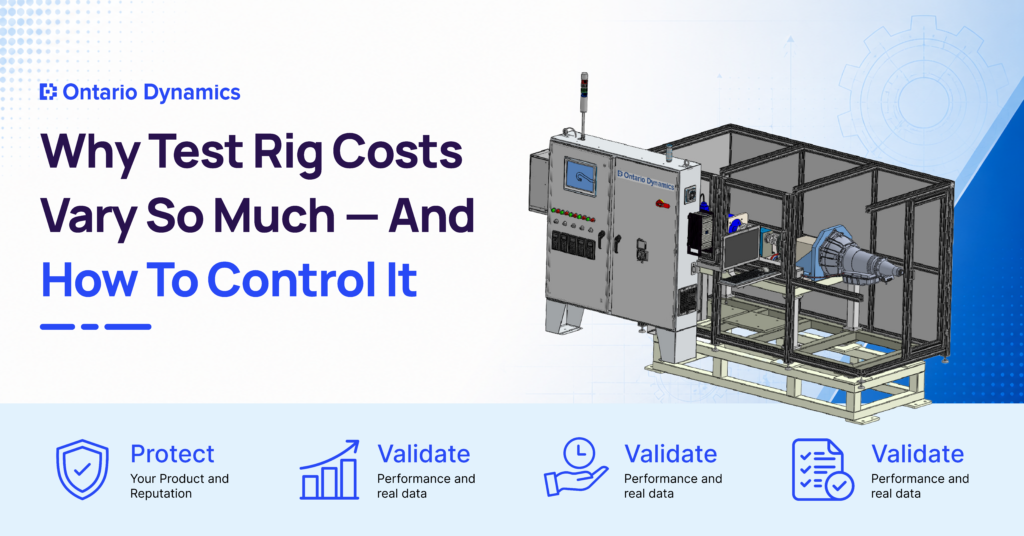
Why Test Rig Costs Vary So Much — And How To Control It
You ask three suppliers for a test rig quote. One says $50,000. Another comes back at $200,000. The third supplier does not give a number right away and asks for a 30-minute call first. At first, this feels frustrating. You may wonder if someone is overcharging, underquoting, or simply guessing. But with custom test rigs, this kind of price gap is common. The reason is not always markup. It is often the scope. A test rig is built around your product, test conditions, data needs, and risk level. A small change in force, sensors, automation, safety, or compliance can change the whole project. That is why the best way to control costs is not to chase the lowest quote. It is to understand what actually drives the number.
What Is A Test Rig?
A test rig is a purpose-built system that holds a product or component in place while controlled forces, pressures, movements, or cycles are applied. The goal is to recreate real-world conditions in a controlled environment, so the product can be tested before it reaches the market. For example, a test rig may repeat the same movement thousands of times, apply load to a part, check for leaks, measure vibration, or confirm how a product behaves under pressure. This helps engineers see whether the product can survive real use. For many manufacturers, test rig development comes after the prototyping stage. Once the product looks promising, the next question becomes simple: will it perform reliably in real conditions?
Test Rig Vs Test Bench Vs Testing Machine — What’s The Difference?
These terms are often used interchangeably in industry. That is understandable, but they can mean different things when it comes to project scope and cost.
Term | What It Is | Typical Size | Best For | Cost Implication |
Test Bench | A smaller bench-mounted setup with instruments, fixtures, and connected controls | Small to medium | Valves, sensors, smaller assemblies, basic checks | Usually lower cost and more flexible |
Test Rig | A larger system where the product is mounted into a fixed structure | Medium to large | Gearboxes, structural components, engines, drivetrain parts | Higher cost due to structure, control, and integration |
Testing Machine | A broad term for any machine that applies controlled loads or test conditions | Any size | Tensile, compression, fatigue, endurance, or functional testing | Cost varies widely by type |
For costing, this distinction matters. A test bench and a full test rig may test a similar product, but they are not priced the same way. A bench may need simple fixtures and instruments. A full rig may need a heavy frame, guarded moving parts, controls, data acquisition, software, and commissioning.
Why Are Test Rigs Important?
A test rig helps protect the product before it reaches customers. If a part fails after launch, the cost can be much higher than the cost of testing. Failures can lead to warranty claims, recalls, delayed production, liability concerns, and loss of trust. Testing is also required in many industries. Aerospace, automotive, medical, energy, and industrial products often need documented test evidence before approval or sale. Without test data, teams may struggle to prove that the product meets the required performance or safety standard.
A good endurance test bench can also compress years of use into days or weeks. Instead of waiting for field failures, the engineering team can recreate repeated use in a controlled way and learn where the product is strong, weak, or close to its limit. Most importantly, a test rig gives real data. It shows actual loads, movement, failure points, performance margins, and repeatability. That is far more useful than assumptions. In short, a test rig is not just another cost. It is insurance on the time, money, and engineering effort already invested in the product.
Why Buyers Often Underestimate Test Rig Cost
Many buyers look at component prices and assume the finished system should be simple to price. That is where the misunderstanding starts. Public benchmark data shows that some basic components can look inexpensive on their own. A simple pneumatic cylinder, valve, entry PLC, or small HMI may not seem costly. But a finished test rig is not just a pile of parts. It also includes design, fixtures, fabrication, electrical assembly, software, safety hardware, calibration, documentation, commissioning, and troubleshooting.
Instrumentation adds up quickly as well. A single force channel and one position channel can already become meaningful money once a load cell, signal conditioner, and encoder are included, before brackets, cables, calibration, or integration are counted. More advanced DAQ hardware, multi-channel force measurement, safety light curtains, and richer software can push the cost of purchased hardware well beyond labour and machine build. This is why two quotes can look very different. One supplier may be quoting a basic machine with limited sensing. Another may include higher-grade measurement, safety, controls, software, and documentation. On paper, both are “test rigs.” In practice, they are not the same system.
The 5 Decisions That Impact Your Test Rig Budget Unnecessarily
These are not flaws in the quoting process. They are engineering decisions. Most of them are made, or missed, before the design even starts.
1. How Much Force Does It Actually Need?
Force capacity is one of the biggest cost drivers. More force means a stronger frame, larger actuators, heavier fixtures, stronger bearings, and more careful safety planning. The common mistake is asking for more force than the test really needs “just to be safe.” That sounds practical, but it can make the system larger and more expensive than necessary. The better approach is to calculate the actual test loads based on the product’s actual operating conditions. A sensible safety margin matters, but it should be based on real data, not a rough guess stacked on top of another rough guess.
2. How Many Axes Of Loading?
A single-axis test, such as a push or pull in one direction, is usually much simpler. Once the test needs to be loaded in multiple directions, the system becomes more complex. Each added axis may require another actuator, sensor, control loop, fixture movement, alignment process, and calibration step. That cost can rise quickly. The mistake is requesting multi-axis testing because it sounds more complete, even when the product only sees one main loading direction in real use. Before specifying multi-axis capability, it is worth mapping how the product is actually used.
3. What Actuation Technology Does The Test Need?
Not every test needs the same actuation technology. Electromechanical systems can be practical and cost-effective for many controlled movements. Hydraulic systems are useful for high-force or high-frequency work, but they entail higher costs, greater maintenance, and greater system complexity. Voice coil and other specialty options may suit high-frequency or precision applications, but they are not needed for every project. The mistake is choosing technology based on how it sounds. Hydraulic may sound more industrial, but that does not make it the right choice for every rig. A good development partner should match the actuation method to the test requirements, not force the test to fit a preferred technology.
4. How Automated Does It Need To Be?
Automation is useful when a test runs often, runs for long periods, needs repeatable cycling, or must operate without constant supervision. It can include PLC control, HMI screens, remote alarms, automatic reports, data logging, and fault detection. But automation also adds cost. It requires programming, controls, sensors, safety logic, testing, and support. If a test runs 50 cycles once a year, full automation may not make sense. If it runs 24 hours a day for endurance validation, automation may be essential. The budget depends on that difference.
5. What Standards And Compliance Does It Need To Meet?
A basic industrial test rig and a regulated aerospace or medical test system are not in the same cost category. Regulated projects may require calibration certificates, traceability, validation documents, risk assessments, controlled revisions, and third-party review. The mistake is assuming the rig needs the highest possible documentation package when the product does not require it. The opposite mistake is also risky: leaving out documentation that will be needed later for approval. The right question is not, “What documentation can we add?” The right question is, “Which standards actually apply to this product and this test?”
Ready to Build Your Product?
Let’s turn your idea into a production-ready product engineered for success.
The 3 Mistakes That Make Test Rig Projects Go Over Budget
Even with a reasonable starting quote, projects can still run over budget. In most cases, the reason is not one big failure. It is a few avoidable decisions made early. The first mistake is starting with vague requirements. In custom engineering, redesign is expensive. If the loads, cycle count, test duration, fixture requirements, data output, safety requirements, or acceptance criteria are unclear, changes will surface later.
Once design, fabrication, or wiring has started, every change costs more than it would have during the brief stage. A proper requirements document is not paperwork for the sake of paperwork. It is one of the best tools for controlling costs.
Second mistake is choosing a supplier solely based on the lowest price. A low quote may simply mean fewer questions were asked at the start. It may leave out safety guarding, software, commissioning, documentation, training, or important assumptions. A higher quote from a more careful development partner may actually reduce the total project cost, as fewer surprises arise later.
Third mistake is treating the test rig as an afterthought. Many teams think about test equipment only after the product design is nearly locked. By that point, there may be less room to adapt the product, the fixture, or the test method. Timelines get tighter, options shrink, and costs go up. Testing should be discussed while the product design is still flexible.
Late-stage testing decisions are one of the [7 common mistakes in product development] – and one of the most avoidable.
How A Good Development Partner Helps You Stay On Budget
A good development partner does not start by pushing a machine. They start by understanding what the test needs to prove. They run a proper requirements session before quoting. This helps separate what is essential from what is optional. It also prevents the quote from becoming a worst-case estimate built around too many unknowns. They challenge the specification in a useful way. If the force requirement looks too high, they ask why. If multi-axis loading is requested, they confirm whether the product really sees those loads. If full automation is listed, they ask how often the system will run and who will operate it. They also break the quote down clearly. This helps the buyer see how much is going into mechanical design, controls, instrumentation, safety, software, documentation, commissioning, and training. With that clarity, scope decisions become easier.
Just as importantly, they define acceptance criteria before the build starts. Both sides should know what the rig must do, how performance will be measured, and what a successful handover looks like. A good partner also stays involved after delivery: operator training, commissioning support, and future modifications matter because products often evolve. A test rig should not become useless the first time the product changes slightly.
Realistic Budget Ranges For Test Rigs And Test Benches
Budget ranges should be treated as starting points, not fixed menu prices. A very simple modular tester may start at around US$30,000, but only when deliberately basic. That means simple actuation, light instrumentation, little or no advanced analytics, and clear exclusions for items such as guarding, customer-supplied fixtures, or test articles. Compliance-heavy testing, documentation, certification support At the upper end, it is important not to treat $600,000 or $700,000 as a hard ceiling. Advanced dynamometer and test-cell projects moving into seven figures, including disclosed values of US$1.15 million, US$1.59 million, and US$1.68 million for large dyno- and emissions-bench-related systems.
That does not mean every test rig will cost that much. It means buyers should understand the class of system they are asking for. A compact test bench, a sensorized endurance rig, an inline inspection station, and a full powertrain test cell are very different projects.
Ready To Scope Your Test Rig Project?
Every test rig project is different. The right cost depends on the product, test loads, cycle count, automation level, data needs, standards, safety requirements, and timeline. A useful first conversation should give you clarity, not pressure. You should come away knowing what type of system you likely need, which requirements are driving cost, and what budget range is realistic before you commit to a full project. If you’re planning a test rig, Ontario Dynamics can help you define the right scope before costs get out of control.
Ready to Build Your Product?
Let’s turn your idea into a production-ready product engineered for success.
FAQs
A simple test bench may start in the $20,000 to $80,000 range, while more involved test rigs often move into the $80,000 to $300,000 range. Advanced endurance systems and regulated test rigs can cost much more. The important thing to remember is that these are starting ranges, not fixed prices. The final cost depends on what the system needs to do, how much data it must collect, how secure it must be, and what documentation is required.
The quotes may appear to be for the same system, but they may not cover the same scope. One supplier may include basic fixtures and simple controls. Another may include safety guarding, higher-grade sensors, data acquisition, software, commissioning, and documentation. Before comparing prices, compare what is included, what is excluded, and what assumptions each supplier made.
Yes, but only when the system is intentionally simple. It is a starting point for a very basic modular tester with simple actuation, limited instrumentation, and clear exclusions. Once you add multi-channel measurement, safety hardware, data acquisition, software, or advanced reporting, the cost rises quickly.
Instrumentation is not just the sensor itself. A load cell, encoder, torque sensor, or pressure sensor often needs signal conditioning, wiring, brackets, calibration, data acquisition, software setup, and integration into the control system. Even a modest force and position measurement setup can become a meaningful hardware cost before mechanical build, safety systems, or engineering labour are included.
Not always. Full automation makes sense when tests run frequently, run for long periods, require repeatability, or must operate without constant supervision. If the test is occasional and short, a simpler manual or semi-automated setup may be enough. The right level of automation should be based on how the rig will actually be used.
Start with clear requirements. Define the loads, cycles, test duration, safety needs, data outputs, and acceptance criteria before design begins. Avoid adding capacity or automation “just in case” unless there is a real reason. Also, choose a supplier who asks detailed questions before quoting. That usually means they are trying to protect the project from expensive surprises later.