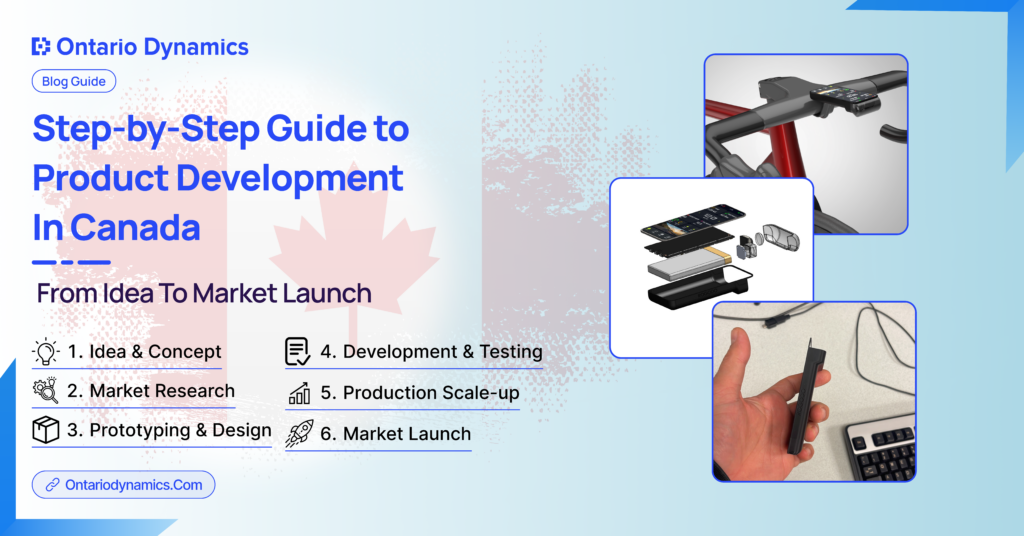
Step-by-Step Guide to Product Development In Canada: From Idea To Market Launch
If you’ve never built a physical product before, the hardest part is not the CAD file or the prototype. The hardest part is turning an idea into something that can be built the same way every time, by a supplier who wasn’t in your head when you imagined it.
That’s what real product development is.
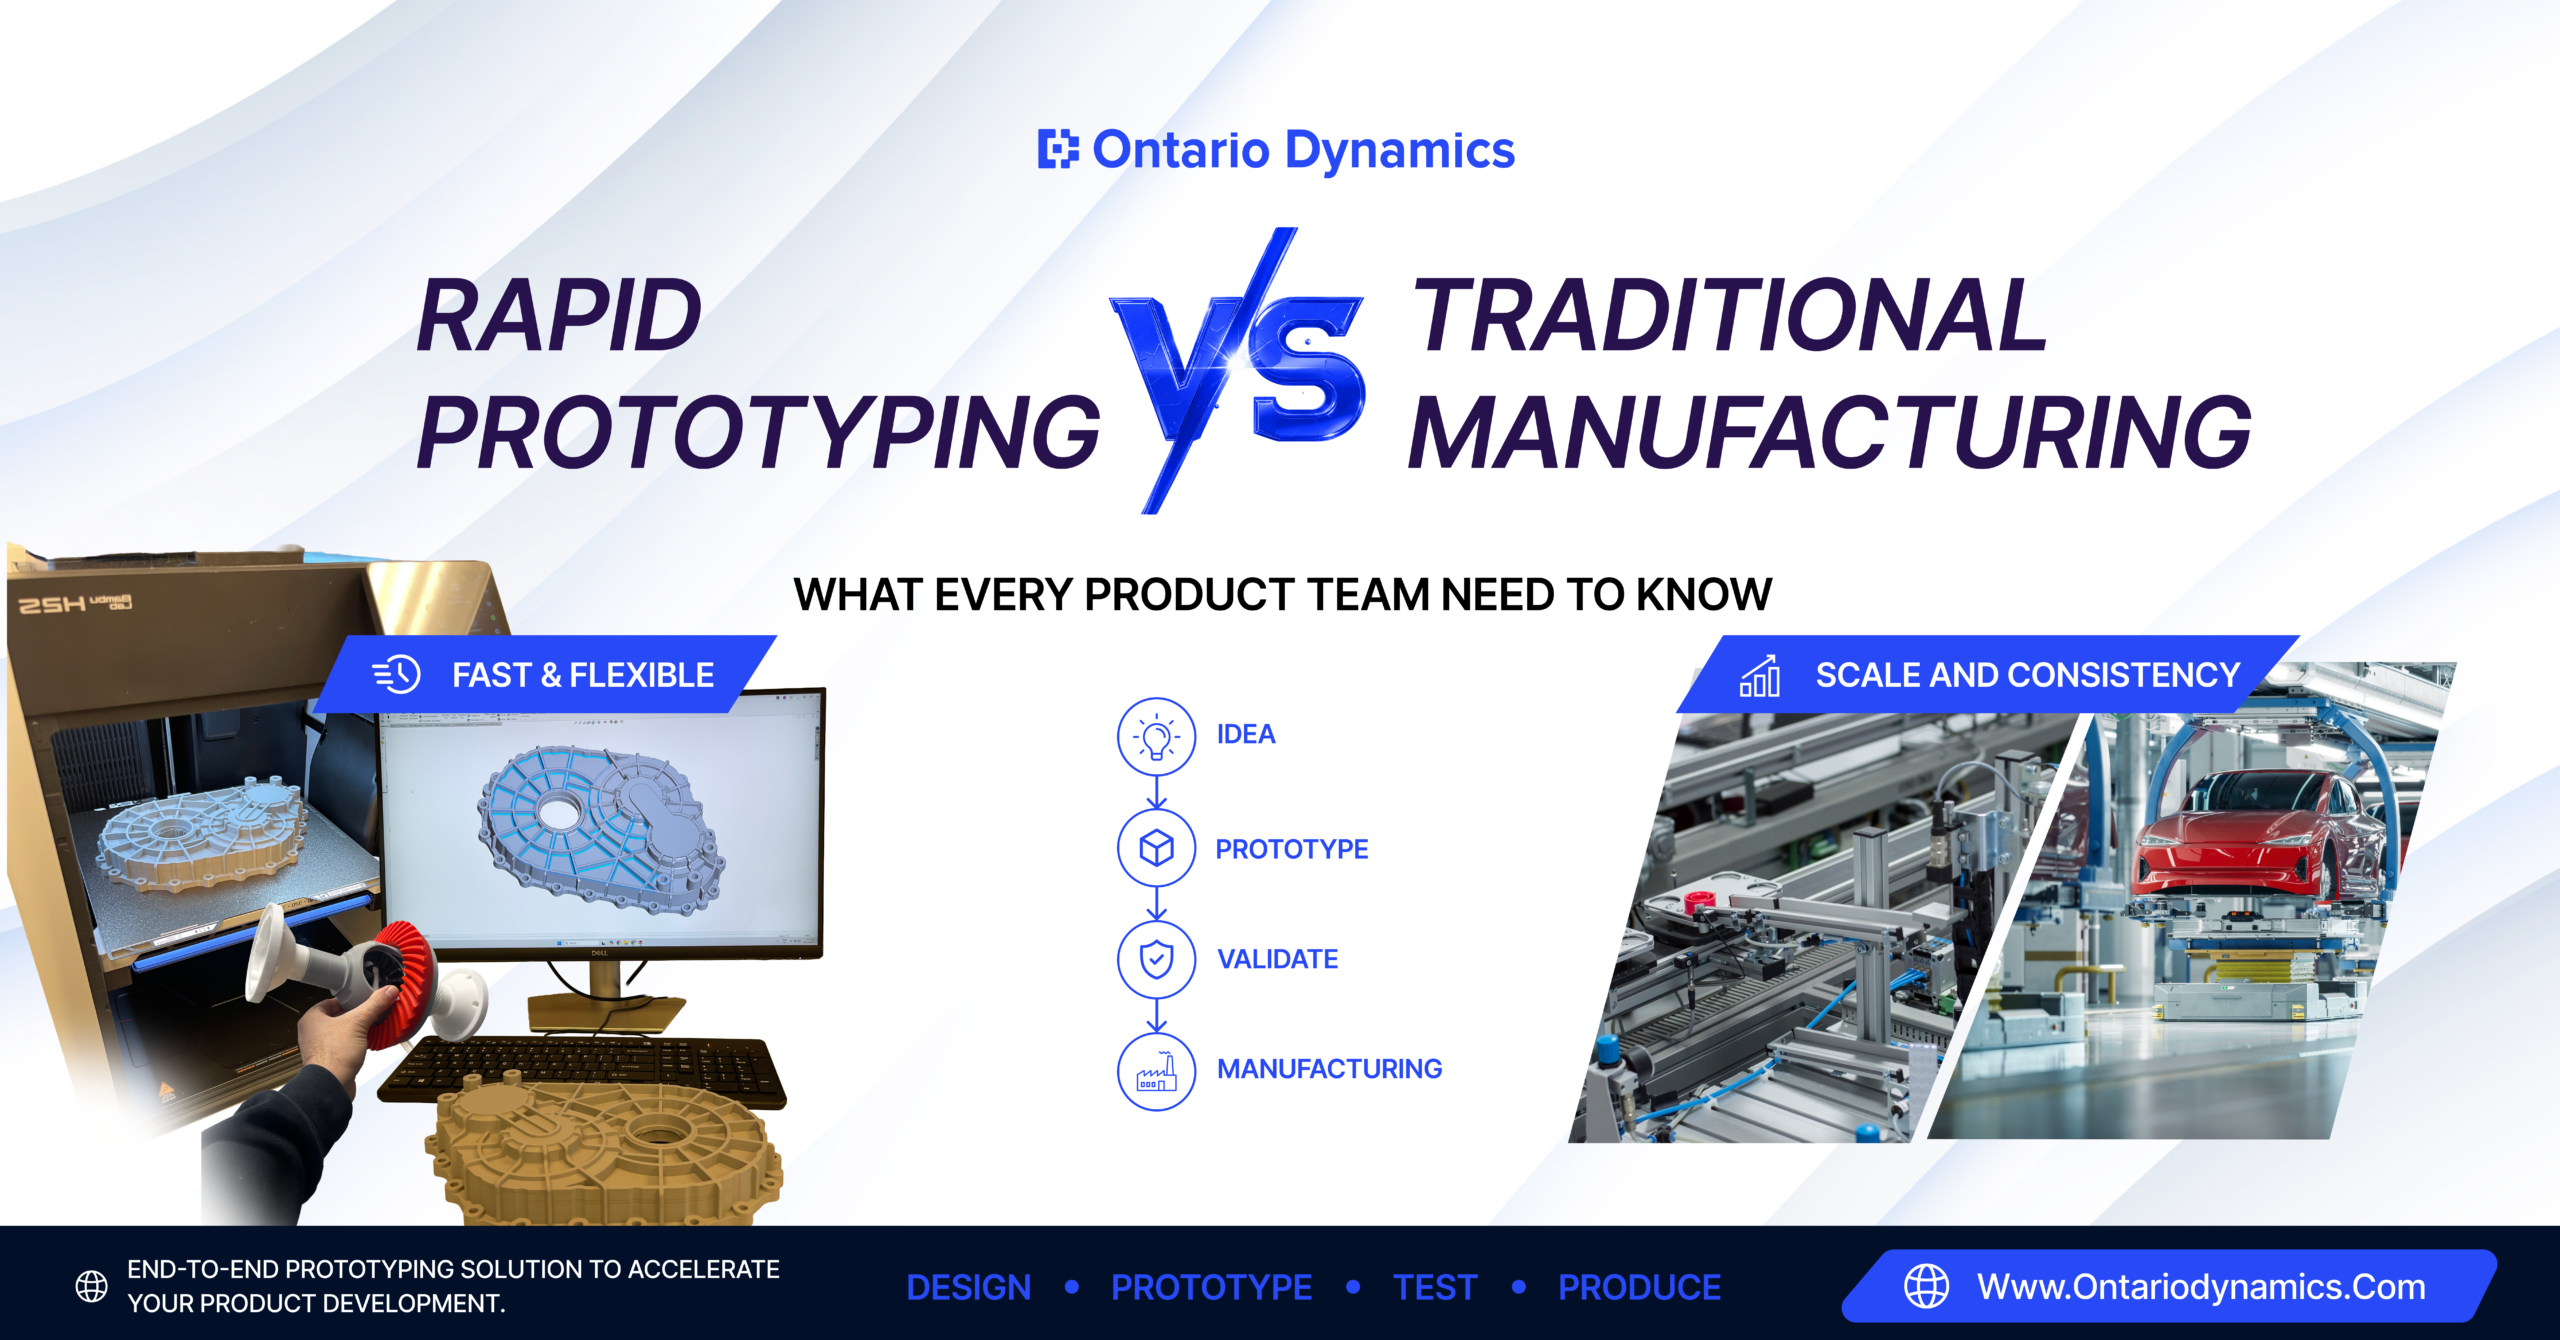
A lot of people start with “design” and think it means a nice-looking render. But a product that looks great and can’t be manufactured cleanly will burn money fast. The safer route is an engineering-led process that locks in important decisions early: interfaces, tolerances, materials, and how the thing will actually be assembled. That’s also exactly how Ontario Dynamics describes their approach: performance in real conditions, manufacturability, and supplier-ready release packages. Today, product development in Canada follows a far more structured path, where engineering, validation, and manufacturing planning happen together instead of in isolation.
Why Product Development In Canada Is Growing Rapidly
Canada is getting more attractive for product work for one simple reason: companies are getting tired of chaos.
When you’re developing hardware, chaos shows up as:
- parts that don’t fit during assembly,
- suppliers asking questions you can’t answer,
- “small changes” that become full redesigns,
- prototype after prototype with no clear learning.
Canadian teams are leaning more into structured development, the kind that treats documentation as a “source of truth” and uses prototyping and testing as planned decision points rather than random experiments. Ontario Dynamics spells this out clearly: they focus on feasibility, architecture, validation, and manufacturing readiness so the product is repeatable for supplier builds. For startups, that’s huge. You don’t get infinite prototype money. A clean process matters more than motivation. This structured approach has made startup product development Canada more practical, especially for founders working with limited budgets who cannot afford repeated redesign cycles.
Steps Involved in Product Development
Product development is not a creative jump from idea to manufacturing. It is a structured engineering process where each stage removes uncertainty before money is committed to tooling and production. The sequence below reflects how real products move from concept to scale.
Step 1: Concept & Technical Feasibility
Every project starts by testing whether the idea can realistically exist in the physical world.
This stage goes beyond brainstorming. The goal is to understand technical limits, risks, and constraints before design work begins. Teams evaluate hardware requirements, operating conditions, regulatory considerations, and core performance expectations.
Key questions addressed at this stage include:
- Can the product physically work as intended?
- Are there safety or compliance barriers in Canada?
- Do materials, components, or technologies already exist to support it?
- What risks could cause redesign later?
Early feasibility prevents expensive rework. Many failures in product development happen because teams skip this step and discover limitations only after investing in design or tooling.
Step 2: System Architecture and Layout Stage
Once feasibility is confirmed, the concept is translated into a functional system structure.
This stage defines how the product is organized before detailed engineering begins. Engineers establish major assemblies, interfaces, and spatial layout so the product behaves as a coordinated system rather than disconnected parts.
Work typically includes:
- Defining major subsystems and component relationships
- Establishing mechanical architecture and packaging layout
- Identifying load paths, sealing zones, and thermal considerations
- Creating initial 3D layouts to validate space and integration
Good architecture decisions made here prevent downstream conflicts. When interfaces are locked early, later engineering becomes predictable and repeatable.
Step 3: Detailed Engineering and Simulation Stage
At this point, engineering replaces assumptions with measurable design decisions.
Detailed models are created using CAD and validated through simulation tools such as FEA. The objective is not appearance but performance, reliability, and manufacturability.
Engineering activities include:
- Detailed part and assembly design
- Material selection aligned with manufacturing processes
- Tolerance definition and fit validation
- Stress, thermal, and motion analysis where required
- Preparation of engineering-grade documentation
Simulation allows teams to identify weaknesses before anything is physically built, reducing iteration cost and shortening development timelines.
Step 4: Prototyping for Alpha and Beta
Prototypes are built to answer engineering questions, not simply to visualize the product.
Each prototype iteration has a clear purpose and produces decisions about what must change and what can be released forward.
Two typical phases occur:
Alpha prototypes
- Validate core function and layout
- Identify integration problems
- Expect failures and adjustments
Beta prototypes
- Represent near-final intent
- Validate usability, assembly, and durability
- Confirm readiness for validation testing
Structured prototyping prevents uncontrolled iteration and ensures learning from every build.
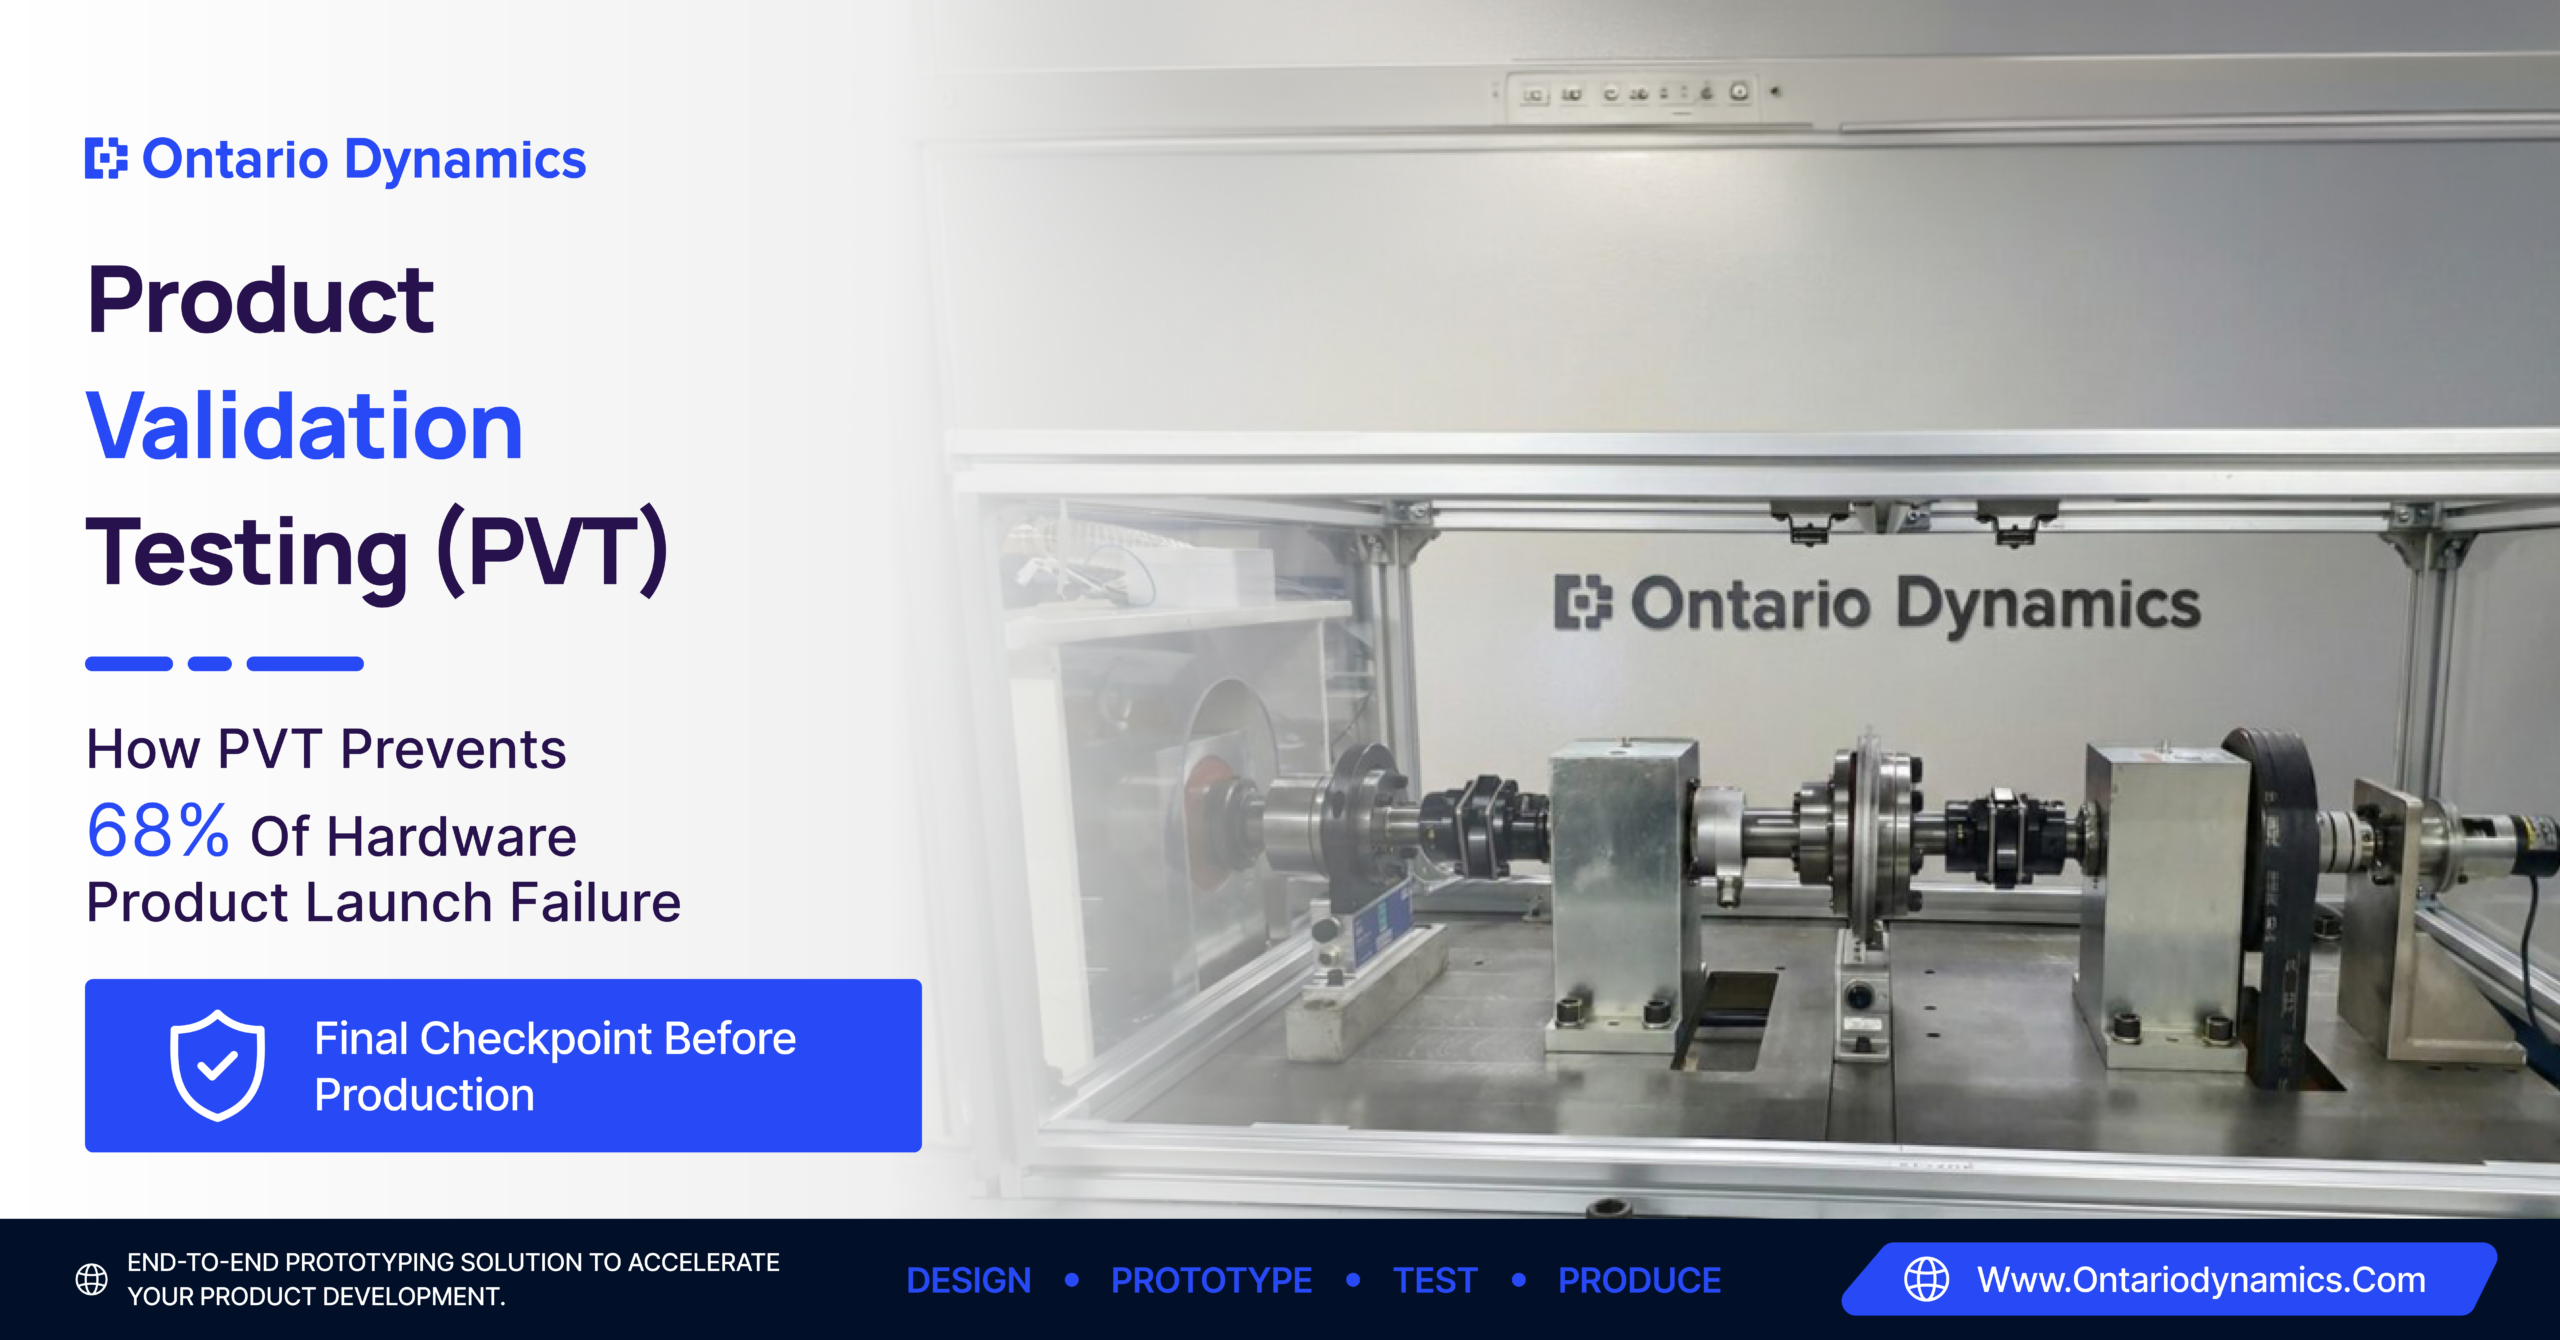
Step 5: Testing and Rigorous Validation Stage
Before manufacturing begins, the design must prove it performs reliably under real conditions.
Validation confirms that the product meets engineering targets, safety expectations, and industry standards. Testing removes uncertainty that could otherwise appear as field failures.
Typical validation work includes:
- Environmental and durability testing
- Reliability and lifecycle evaluation
- Safety verification
- Functional performance confirmation
This stage establishes confidence that the design will behave consistently outside controlled development environments.
Step 6: Manufacturing Readiness with DFM/DFA
The final step prepares the product for scalable production.
A working prototype is not automatically manufacturable. Manufacturing readiness ensures suppliers can build the product repeatedly without manual adjustment or interpretation.
Key outputs include:
- Finalized materials and tolerances
- Complete Bill of Materials (BOM)
- DFM/DFA optimization for efficient assembly
- Supplier-ready drawings and documentation
- Defined quality and inspection requirements
At this stage, the product transitions from engineering development to production scale-up, with documentation acting as the single source of truth for manufacturing.
Step 7: Pilot Production & NPI
At this stage, we run a pilot production to introduce the new product into manufacturing. This allows us to test and validate the jigs, fixtures, tools, and processes in real production conditions. We identify and fix assembly issues early, ensuring everything works smoothly before full-scale launch.
Step 8: Mass Production & Launch
Here, we prepare the product for large-scale manufacturing. We conduct detailed Design for Manufacturing (DFM) and Design for Assembly (DFA) reviews, finalize materials and tolerances, and lock the Bill of Materials (BOM). This ensures the product is ready for sourcing, cost control, and efficient production before market launch.
Step 9: Manufacturing Readiness & Continuous Improvement
After launch, we continue to monitor product performance and user feedback. We manage updates, maintenance plans, and future improvements. Ongoing evaluation and refinement help maintain product quality and support long-term performance.
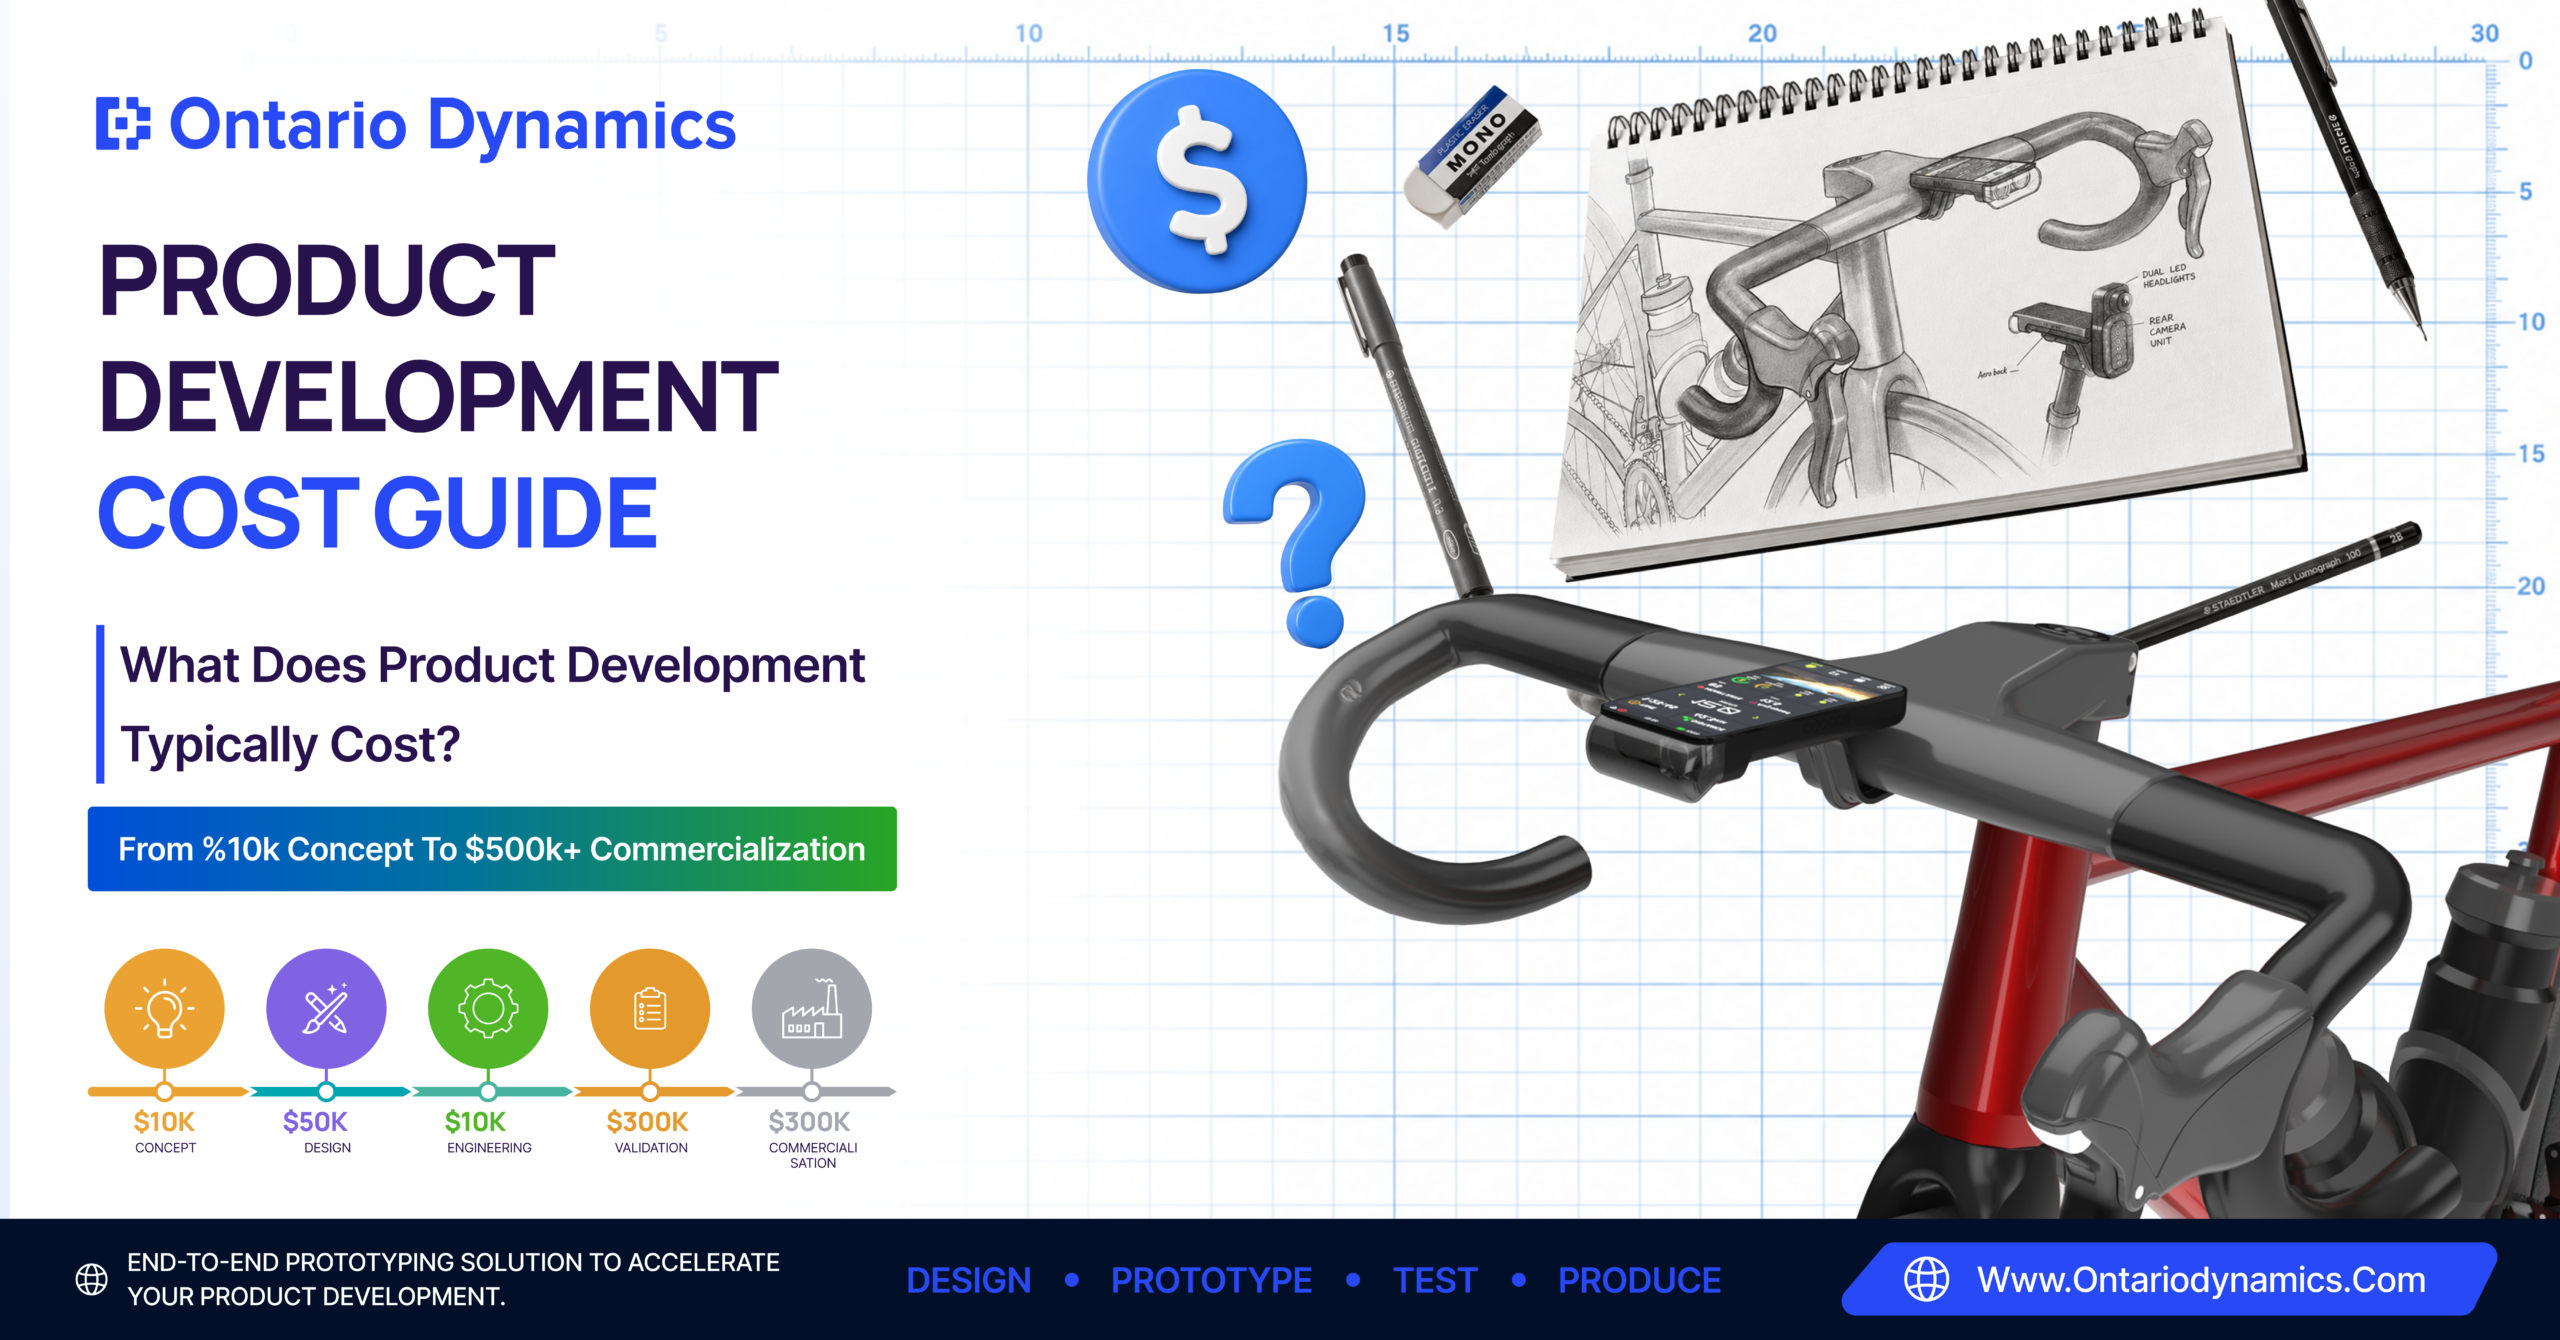
Cost of Product Development In Canada
There is no honest single number because cost depends on:
- complexity (mechanical only vs electro-mechanical),
- number of iterations,
- How much testing is needed?
- What manufacturing method do you choose?
- and how “supplier-ready” your documentation is.
But I can tell you the highest hidden cost almost every time:
Redesign loops
Ontario Dynamics specifically says their structured process reduces redesign loops by addressing interfaces, tolerances, and manufacturability early. That is the money saver.If you want cost control, you don’t start by cutting engineering time. You start by preventing the rework that comes from skipping engineering thinkin
Final Takeaway
If you want a product to reach the Canadian market, you need to move beyond the simplistic idea of going straight from design to prototype to manufacturing. Whether you are exploring early validation, product prototyping Canada, or full manufacturing product development Canada, the goal remains the same, reducing uncertainty before launch.Real product development is more deliberate than that. It begins with feasibility work, where weak concepts are identified and eliminated before they consume time and money. From there, the focus shifts to architecture and layout, clearly defining how the product is intended to function and how its systems interact.
Next comes detailed engineering, where the goal is to make the product truly buildable, not just something that looks good on paper. Alpha and beta prototypes follow, created with the intention of learning and refining through structured testing rather than discovering problems by accident. Validation testing then confirms the product can withstand real-world conditions and meet regulatory and performance requirements. Finally, Design for Manufacturing and Design for Assembly ensure production will be predictable, efficient, and scalable.
This is the disciplined path from idea to market launch, and it is how you bring a product to market without putting your budget at unnecessary risk.
How To Choose The Right Product Development Partner
If you’re searching for “product development Canada,” most websites will sound similar. So here’s what to look for that actually matters.
If they only talk about concepts and visuals, you will pay later. Ontario Dynamics repeatedly emphasizes supplier-ready drawings, GD&T where required, tolerance stack-ups, and DFM/DFA. That’s the kind of language you want to hear.
Ask what you receive at the end:
- CAD?
- drawings?
- BOM?
- assembly docs?
- test plans?
- revision control?
Ontario Dynamics explicitly mentions controlled CAD/drawings/BOMs and BOMs, plus traceable documentation, and support during quoting and vendor Q&A.
If they can’t explain what each prototype is meant to prove, that’s a risk.
This is where projects either stay sane or spiral out of control. Ontario Dynamics highlights locking interfaces and tolerances early to avoid “it doesn’t fit” surprises.